
Although automated sockets and temperature sensing is useful, I needed to solve a more complex problem with my home automation system. I have Economy 7 heating, which heats both my hot water and central heating system overnight on cheap electricity, so I can use it during the day. The controller for my hot water was old and mechanical (a ticking clock) which was in my daughters bedroom next to the hot water tank and the ticking kept her awake at night.
It has a boost function, which allows you to turn on a second heating element during the day for an hour, if you run out of hot water. Again, this button was in my daughters bedroom, and rather high up, making it difficult to reach during the night, if we needed extra hot water, without waking her.
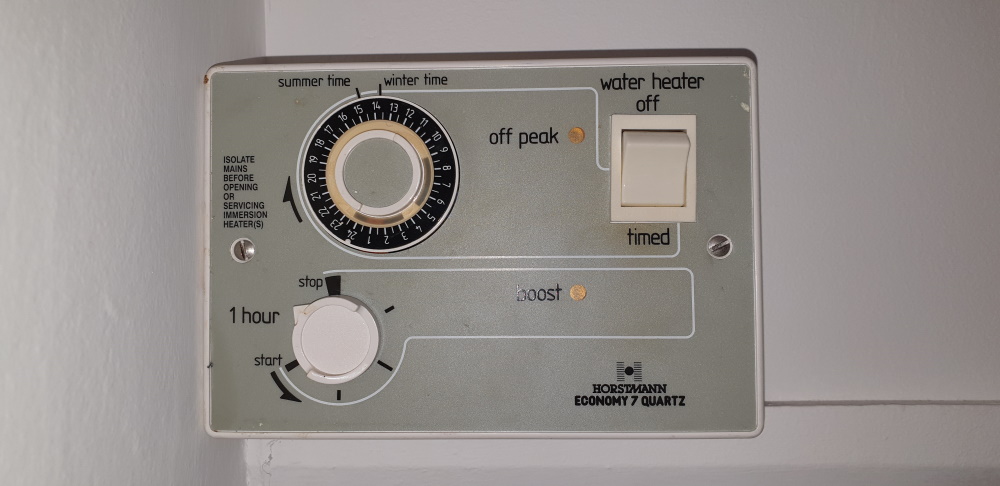
Economy 7 Heating Clock
You can buy digital controllers which would solve the ticking problem, but they would still have the boost button problem. A more automated solution would be better.
I wanted to use Tasmota and a Wemos D1 mini as I had found them to be very reliable and easy to configure and manage in other projects. The two elements (Main and Boost) are mains voltage and 3kW each (13A @ 230v) so I cant control them with a microcontroller pin ! 😊
I used two 25A mains rated relays with 12v coils. I can fit these, plus a couple of power supplies on a DIN rail in an IP rated enclosure.
However to switch the relays I needed to control them with a MOSFET. There wasn’t an existing MOSFET shield for the Wemos D1 mini, so I decided to build my own shield with a custom PCB.
The design is quite simple. The MOSFET needed to be logic level, turned on with 3.3v. The relays only draw about half an amp, but for future use, the shield supports more current.
There is a dedicated blog post about the process I went through to design and manufacture the MOSFET shield, and you can buy them on Tindie 😊


4 Channel MOSFET Shields for Wemos D1 Mini
The custom immersion heater controller needs two relays to control the two heating elements. The controller must prevent the possibility of ever having both immersion heaters on at the same time. This would draw too much current (26A!) and overload the mains wiring to the controller. The previous manual controller had the same interlock to prevent both elements being powered. If you select the boost function, it turns off the main heater. It’s not safe enough to just have one heater on one relay and the second heater on the second relay. Although I could configure the code to not turn on both relays at the same time, there was a risk that if the microcontroller crashed or hung, both relays could come on at the same time.
So, the solution is to use the first relay to provide power and the second relay to switch the power between the main and boost elements. When both relays are off, power is off. With the power relay on and the second relay off, the main element is powered. With the power relay on and the second relay on, the boost element is powered. At no point can both elements be powered at the same time. Safe!

Immersion Heater Controller Diagram
The circuit was built in an IP rated box and tested, then installed in the hot water cylinder cupboard.

Immersion Heater Controller Installed
Node Red was configured to control it. There are two flows. The first turns the main element on between 00:30 and 06:30 to heat the tank overnight. This just needs to turn the first relay on, to apply power through the normally closed contact of the second relay to the main element.
The second flow is more complex, but essentially sends four messages; the first two messages send “On” commands to both relays, to the first relay supplies power and the second relay connects the boost element. After a delay of 60 minutes, two further messages send “Off” commands to turn both relays Off. A button is used on the Node Red Dashboard user interface to trigger the flow.
I also have two manual switches on the dashboard to control the individual relays, if required.

Immersion Heater NodeRed Flow

Immersion Heater NodeRed Dashboard
My Economy 7 hot water system is now fully automatic, silent, hidden, and fully controllable from any browser enabled device in the house!
Combine this with the hot water tank temperature monitoring I have already installed and I have complete visibility over how much hot water I have left and the ability to switch on the boost all from my mobile phone browser if I ever run low !
